In today’s world, where energy conservation is a priority, smart lighting systems have emerged as a practical and efficient solution for reducing energy consumption. These systems not only enhance the convenience and ambience of your living space but also contribute significantly to saving energy and lowering utility bills. This article will guide you through the process of installing a smart lighting system, offering insights into its benefits, components, and step-by-step installation instructions.
Benefits of Smart Lighting Systems
Energy Efficiency
Smart lighting systems are designed to use energy more efficiently than traditional lighting. They allow you to control the lighting remotely, schedule automatic on/off times, and adjust brightness levels based on the time of day or occupancy. These features help in reducing unnecessary energy usage.
Convenience and Control
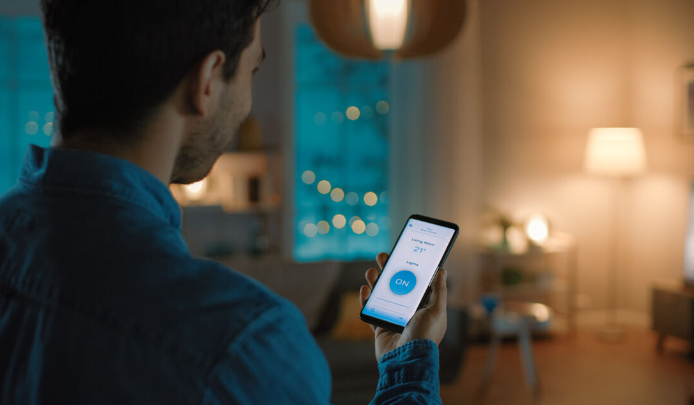
With smart lighting, you can control your lights using a smartphone app, voice commands, or automated schedules. This level of control adds convenience to your daily life, allowing you to adjust the lighting without having to physically interact with switches.
Enhanced Security
Smart lighting systems can improve the security of your home. You can set the lights to turn on and off at specific times, making it appear as though someone is home even when you’re away. Additionally, motion sensors can trigger lights to turn on when movement is detected, deterring potential intruders.
Customisation and Ambience
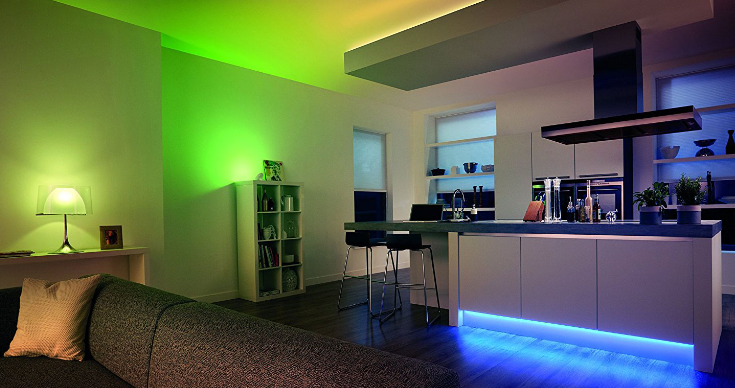
Smart lighting offers a wide range of customisation options, including colour temperature adjustments and dimming capabilities. You can create different lighting scenes to match your mood or activities, enhancing the overall ambience of your home.
Components of a Smart Lighting System
Before diving into the installation process, it’s essential to understand the key components of a smart lighting system:
Smart Bulbs
Smart bulbs are the primary component of a smart lighting system. They come with built-in wireless connectivity, allowing them to be controlled remotely. These bulbs are available in various shapes, sizes, and color temperatures to suit different lighting needs.
Smart Switches
Smart switches replace traditional wall switches, enabling you to control the connected lights remotely. They are particularly useful for controlling non-smart bulbs or existing lighting fixtures without having to replace the bulbs.
Smart Plugs
Smart plugs can turn any standard lamp or lighting fixture into a smart device. By plugging a lamp into a smart plug, you can control it using your smartphone or voice commands.
Smart Hubs
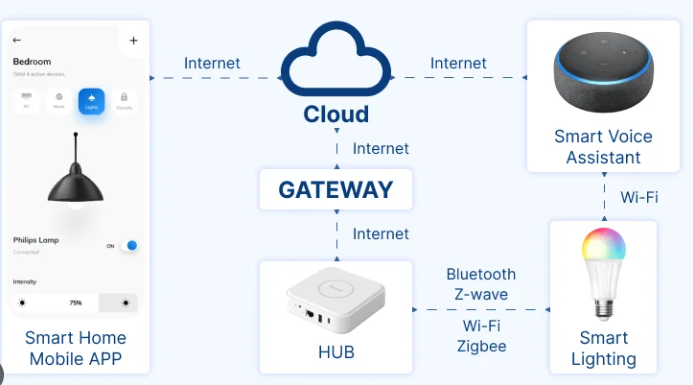
A smart hub acts as the central controller for all your smart lighting devices. It connects to your home’s Wi-Fi network and communicates with the smart bulbs, switches, and plugs. Some smart lighting systems, like Philips Hue, require a hub, while others, like LIFX, do not.
Motion Sensors
Motion sensors detect movement and can trigger lights to turn on or off automatically. They are useful for areas like hallways, bathrooms, and outdoor spaces where you may not want to manually control the lights.
Voice Assistants
Voice assistants like Amazon Alexa, Google Assistant, and Apple Siri can be integrated with smart lighting systems, allowing you to control the lights using voice commands.
Step-by-Step Guide to Installing a Smart Lighting System
Step 1: Plan Your Lighting Setup
Before purchasing any equipment, assess your current lighting setup and determine which areas you want to automate. Consider the following:
- Which rooms or areas will benefit most from smart lighting?
- Do you want to replace existing bulbs with smart bulbs, or do you prefer using smart switches or plugs?
- Will you need motion sensors for specific areas?
- Do you already have a voice assistant that you want to integrate with the system?
Step 2: Choose Your Smart Lighting Products
Based on your plan, select the smart lighting products that best meet your needs. Some popular options include:
- Philips Hue: Offers a wide range of smart bulbs, switches, and accessories. Requires a hub for full functionality.
- LIFX: Provides high-quality smart bulbs with built-in Wi-Fi, eliminating the need for a hub.
- TP-Link Kasa: Offers affordable smart bulbs, switches, and plugs with easy integration and control.
Step 3: Install Smart Bulbs
- Turn Off Power: Before installing smart bulbs, turn off the power to the light fixture to avoid any electrical hazards.
- Remove Old Bulbs: Carefully remove the existing bulbs from the fixtures.
- Install Smart Bulbs: Screw in the smart bulbs into the fixtures.
- Restore Power: Turn the power back on and ensure the bulbs are working.
Step 4: Set Up the Smart Hub (if required)
- Connect Hub to Router: If your smart lighting system requires a hub, connect it to your Wi-Fi router using an Ethernet cable.
- Power Up the Hub: Plug in the hub and power it on.
- Install the App: Download the corresponding app for your smart lighting system on your smartphone.
- Follow Instructions: Follow the in-app instructions to connect the hub to your Wi-Fi network and pair it with the smart bulbs.
Step 5: Install Smart Switches (optional)
- Turn Off Power: Switch off the circuit breaker for the switch you intend to replace.
- Remove Old Switch: Carefully remove the existing wall switch.
- Connect Wires: Connect the wires to the smart switch according to the manufacturer’s instructions. Ensure you match the wire colours correctly.
- Mount the Switch: Secure the smart switch into the wall and attach the face plate.
- Restore Power: Turn the circuit breaker back on and test the switch.
Step 6: Install Smart Plugs (optional)
- Plug in the Smart Plug: Insert the smart plug into an electrical outlet.
- Connect Device: Plug the lamp or lighting fixture into the smart plug.
- Set Up the Plug: Use the corresponding app to connect the smart plug to your WI-Fi network and pair it with your account.
Step 7: Set Up Motion Sensors (optional)
- Install Batteries: Insert batteries into the motion sensor if required.
- Mount the Sensor: Place the motion sensor in the desired location, ensuring it has a clear view of the area you want to monitor.
- Pair with System: Follow the manufacturer’s instructions to pair the motion sensor with your smart lighting system.
Step 8: Integrate Voice Assistants (optional)
- Open Voice Assistant App: Open the app for your voice assistant (e.g., Amazon Alexa, Google Home, Apple Home Kit).
- Enable Skill/Action: Enable the corresponding skill or action for your smart lighting system.
- Link Accounts: Follow the prompts to link your smart lighting account with the voice assistant.
- Discover Devices: Use the app to discover and add your smart lighting devices.
Step 9: Configure Scenes and Schedules
- Open the App: Open the app for your smart lighting system.
- Create Scenes: Set up different lighting scenes for various activities, such as reading, watching TV, or hosting a dinner party. Customise the brightness and colour temperature for each scene.
- Schedule Timers: Schedule your lights to turn on and off at specific times to match your daily routine and maximise energy savings.
Step 10: Monitor and Adjust Settings
- Monitor Usage: Use the app to monitor your energy usage and identify any areas where you can improve efficiency.
- Adjust Settings: Make adjustments to your lighting settings as needed to ensure optimal performance and energy savings.
Conclusion
Installing a smart lighting system is a straightforward process that can significantly enhance the energy efficiency, convenience, and security of your home. By following this step-by-step guide, you can easily set up and customise your smart lighting system to meet your needs. Embrace the benefits of smart lighting and take a proactive step towards a more energy-efficient and connected home.
